Graffiti Removal Procedure for Stone, Masonry, and Tile Surfaces
by Fred Hueston
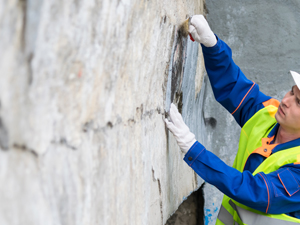
If your beautiful building, wall, or other surface has just become the unintended canvas for graffiti, your first reaction might be to call your maintenance staff to pressure wash it away. Unfortunately, pressure washing can leave stains behind or shadowing caused by the high pressured water. If you are dealing with paint, markers, or other water-soluble types of graffiti, as well as post-cleanup stains or shadowing on stone, tile, brick, or masonry, this article offers some guidance on what to do next.
Graffiti Types
There are many kinds of paints, markers, or other mediums that are used for graffiti. The most common types are aerosol paints and felt tip markers because they are easy to acquire and relatively inexpensive. Other graffiti mediums include chalk, charcoal, foods such as ketchup and mustard, red clay, and more. Any graffiti created with water-soluble material will be easy to remove with a mild washing.
Scribing is a type of graffiti that often causes permanent damage since a knife, screwdriver, rock, or other sharp object is used to scrape away the surface.
Graffiti Removal Rules
When it comes to graffiti removal, here are some very important considerations.
Time
The longer graffiti remains on a surface, the more likely it is to soak into the surface. The deeper it penetrates into the surface, the more difficult it will be to remove. For this reason, you will want to attempt removal as soon as possible.
Temperature
During summer months and in areas with warm climates, graffiti will dry faster and will have a tendency to penetrate deeper than in colder climates.
Abrasives
High pressure washing and abrasive brushes should be avoided, especially on soft stone, brick, and masonry surfaces. These methods may remove the graffiti but could leave a deep mark or what is called shadowing which is nearly impossible to correct.
Cleaners
Be careful choosing the proper cleaners or stain removers. Certain chemicals will emulsify the paint and drive it deeper into the surface making removal even more difficult.
Removing Graffiti
Step 1
Attempt to identify the graffiti type. Identification is key, since it will help you choose the proper chemical. Paint or marker are water-based or solvent-based mediums. Water-based paints can generally be removed with mild detergents, whereas solvent-based paints will require mineral spirits, paint stripper, or other solvent-based cleaning agents. The best way to find out what type of medium you are dealing with is to test a small area as follows. Once you know the medium, proceed to Step 2.
CAUTION: Make sure to do the water-based test first, since water-based paints can give false-positive test results with the solvent-based test.
Water-Based Test
Mix some mild detergent, such as a pH-neutral cleaner or dish soap and water in a spray bottle. Saturate a small area and allow it to sit for a few minutes. Wipe it off with a soft, white cloth. You may also agitate the area with a soft nylon bristle brush. If the graffiti comes off easily, then you are dealing with a water-based paint.
Solvent-Based Test
Moisten a clean, white rag with a small amount of mineral spirits. Gently blot the graffiti. If the graffiti is easily removed, then you are dealing with a solvent-based paint.
Step 2
- Prepare a solution, per the manufacturer’s dilution instructions, of a pH-neutral cleaner or dish soap and water in a bucket or sprayer.
- Rinse the surface with plain, clean water. This step is important, because it removes any potentially abrasive material such as dust, dirt, or grit from the surface.
- Apply the cleaning solution with a soft nylon scrub brush. Work from the bottom of the wall to the top. Do not let the solution dry. If necessary, work in small sections. Lightly scrub the surface with the nylon brush and rinse with clean water.
- If the above technique does not remove the graffiti, proceed to step 3.
Step 3
- Make sure the surface is dry before proceeding further.
- Put some paint stripper, such as mineral spirits, in a chemical-resistant spray bottle.
- Apply a mist to the graffiti and scrub with a dry nylon brush.
- Rinse the area with paint stripper.
- Repeat this process, working in small areas at a time, from the bottom of the wall up. Be sure to rinse any streaks as you work.
- If the graffiti is not totally removed, this means it is a stain.
General Instructions for Removing Stains
To remove a stain, apply a poultice, that is, a paste made of an absorbent powder mixed with a chemical. As the poultice dries, it wicks or lifts the stain out of the pores in the surface. First, select the appropriate ingredients.
Poultice Ingredients
Following are some types of poultice powders to mix with your cleaning agent:
- Clays (Attapulgite, Kaolin, Fullers Earth) WARNING: DO NOT USE ON RUST STAINS
- Talc
- Chalk (whiting)
- Sepiolite (hydrous magnesium silicate)
- Diatomaceous Earth
- Methyl Cellulose
Clays and diatomaceous earth are usually the best. Do not use whiting or iron-type clays, such as Fullers Earth, with acidic chemicals. They will react with the material, canceling the effect of the poultice.
Many stains are so deeply embedded that the poultice alone will not be completely effective. Some type of chemical solution will need to be added to the poultice. When the poultice and chemical are applied, the chemical is absorbed into the stone or masonry. The chemical reacts with the stain and is re-absorbed into the powder/material.
Following are suggested poultice ingredients. Please use extra caution when handling the chemicals listed below. Thoroughly read the Safety Data Sheets for each chemical before use.
- Iron (rust) – Poultice with Iron Out + powder + water. Iron Out is available at hardware stores. This may etch polished marble. If so, re-polishing will be necessary.
- Ink – Poultice with mineral spirits or methylene chloride + powder.
- Oil – Poultice with ammonia + powder. Methylene chloride can also be used on tough oil stains.
- Coffee, Tea & Food – Poultice with 20 percent hydrogen peroxide + powder.
- Copper – Poultice with ammonium chloride + powder.
- Water-Based Paint – Poultice with a commercial paint remover + powder.
- Oil-Based Paint – Poultice with mineral spirits + powder. Deep stains may require methylene chloride.
Applying the Poultice
- Wet the stained area with distilled water. Pre-wetting fills the pores of the stone with water, which will help isolate the stain and accelerate the removal by the chemical.
- Prepare the poultice. Mix the powder and the chemical of choice into a thick paste, about the consistency of peanut butter or thick enough that it will not run.
- Apply the poultice to the stain. Apply the paste approximately 1/4-inch thick, extending beyond the stained area by about one inch. Be careful not to spill any on the surrounding area.
- Cover the poultice with plastic (food wrap works great). Tape the plastic down to seal the edges. It also helps to poke several small holes in the plastic, so that the powder will dry out. Failure to do this may result in the poultice staying wet. The idea is to allow the moisture to slowly evaporate from the poultice.
- Allow the poultice to dry thoroughly. This is a very important step. The drying of the poultice is what pulls the stain from the stone into the poultice material. If the poultice is not allowed to dry, the stain may not be removed. Drying usually takes from 24 to 48 hours.
- Use a flat, plastic scraper to carefully remove the poultice from the stain. Rinse with distilled water and buff dry with a soft cloth. If the stain is not removed, reapply the poultice. It may take up to five poultice applications to remove very difficult stains.
Some chemicals may leave etch damage on honed or polished marble and limestone surfaces. If etching occurs on a polished surface, apply polishing powder and buff with a piece of burlap to restore the shine. If etching occurs on a honed surface, do not use polishing powder, because this will leave a polished area that does not match with the surrounding finish. Contact a professional stone restoration contractor to remove the etch and restore your honed finish.https://https://surfacecarepros.com
This article, written by Fred Hueston, Chief Technical Director of Surface Care PROS, and president of Stone Forensics, is one of a series of articles written and published on behalf of Surface Care PRO Partners.